
Paper Transfer Tape Installation Instructions
Follow These 4 Simple Steps for a successful application:
1. Environmental Conditions
First, check your surface temperature. To apply the graphic, the temperature of your surface should be 50 to 90 degrees Fahrenheit. And there’s good reason: Adhesive becomes brittle when it’s too cold, and gummy when it’s too hot. Application outside the recommended temperature range reduces the chances that your vinyl will adhere properly. (Hint: If the surface is hot to the touch, it’s more than 90 degrees and you should wait until the surface cools, or if possible, move the vehicle to the shade.) If the surface temperature’s right, you’re ready for the next step!
2. Gather These Household Tools:
- Masking tape Level
- Squeegee or Credit Card
- Application spray
- Pin or exacto knife (optional)
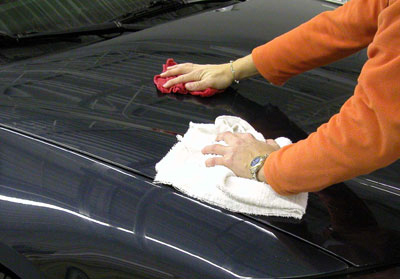
3. Now, Prepare A Clean Surface:
No matter how clean we keep our cars, surfaces just get dirty. To ensure the best adhesion, it’s essential to clean the surface thoroughly prior to applying your graphic.
Ou r Simple Two-Step Cleaning Process:
1. Wash and rinse the area with liquid dish detergent and warm water. Dry the surface with a clean, lint-free towel or cloth.
2. Wipe down the area with rubbing alcohol. To avoid decontamination during this step, wipe the surface in just one direction. You are now ready to apply the vinyl!
4. Apply:
***If you your graphics have plastic transfer tape, YOU MUST USE the Dry Application Method.
We highly recommend using the Wet Application Method, so you can remove and re-position your decal as needed for up to several minutes. Applying a vinyl graphic DRY does not allow for mistakes. Once the vinyl touches the surface, you cannot remove it without damage to the decal.
1. Measure once, measure twice, measure three times if you think you need to. While you can remove the vinyl to re-position using the Wet Application Method, it is better to get your alignment vertically and horizontally right from the start.
2. Find a flat surface (and an extra set of hands, if possible) and lay the graphic on it. Using a squirt bottle filled with water simply spray the adhesive side as you remove the backing. Also spray the area of the vehicle that you just cleaned.
3. App ly the vinyl to the wet surface, being careful NOT to stretch the vinyl excessively during its application. Over-stretching the vinyl is the main cause of “end lift.”
4. Vinyl is a press ure-sensitive product, so use a squeegee to remove excess fluid and/or air from behind the vinyl. To remove the application solution from between the decal and the vehicle, start by placing the squeegee in the middle, and use a straight-up or straight-down motion. You should see drops of the solution “pushed” out of the edges.
The Finishing Touches …
If your decal or pin-striping has gone over doors or panels, we recommend using the exacto knife to cut it, and then wrapping the remaining sections over the panel. To cut or trim a stripe or graphic, use a very sharp knife and very little pressure to avoid damaging the paint. • If you see any air bubbles, puncture them with a pin. Do not slit the vinyl to release air, or it will spread or gap.
You’ve done it, stand back and enjoy your new graphic!